To add a roaster to your RoastPATH Portal:
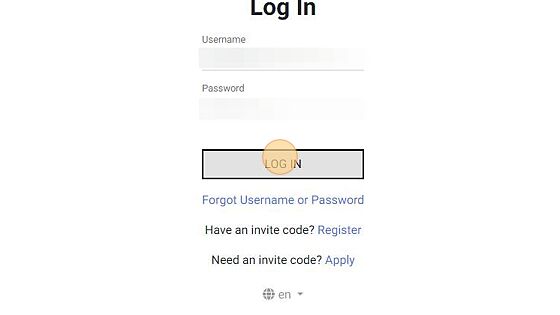
- Sign in to your account at RoastPATH Portal.
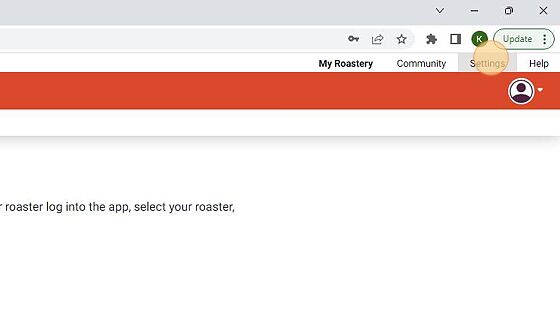
- Click Settings in the upper-right navigation bar.
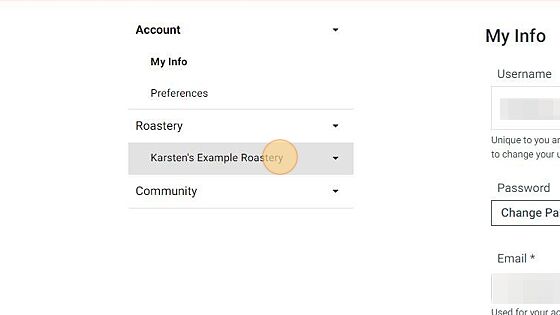
- In the left sidebar, open the Roastery drop down.
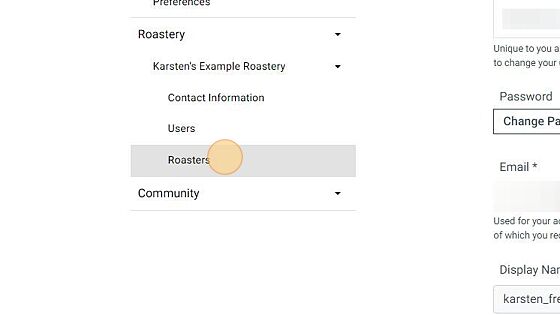
- Select your roastery, then choose Roasters from the sub-menu.
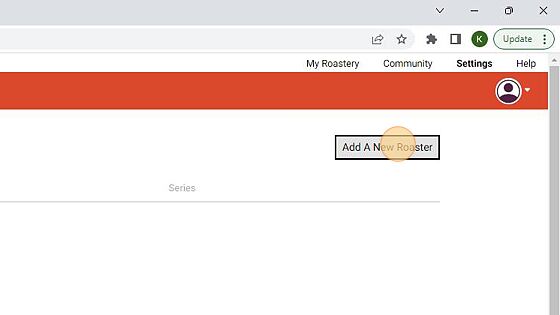
- Click Add a New Roaster on the right side of the screen.
Enter the following details:
- Name – Your internal name for the roaster
- Manufacturer
- Model
- Series
Your selections will generate a suggested configuration to help your roaster connect to RoastPATH.
After installing the RoastPATH App, follow the steps in the article Connecting RoastPATH & your Roaster.
If you have a connection issue or trouble establishing a connection, see the article Troubleshooting a Connection between RoastPATH & your Roaster or contact support for help.
Guide to Adding a Roaster in RoastPATH
1. Log In to the RoastPATH Portal
2. Click "Settings"
3. Click "Roastery"

4. Click "The name of your Roastery"
5. Click "Roasters"
6. Click "Add A New Roaster"
7. Name your Roaster

8. Select the Manufacturer

9. Select the Model
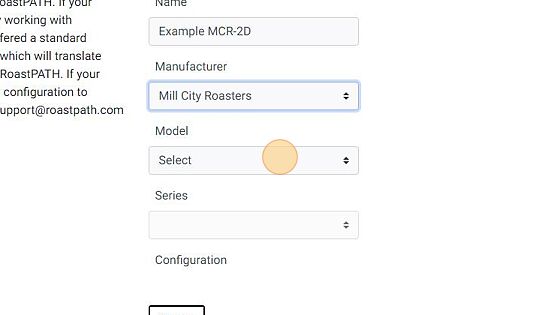
10. Select the Series
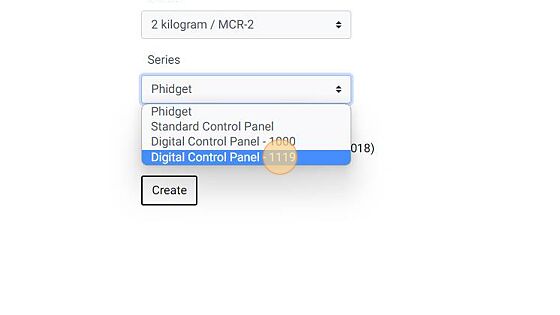
11. Click "Create"

Comments
0 comments
Please sign in to leave a comment.